How All-on-6 Implants Changed One Patient’s Life

Problem: All upper teeth severely impacted by gum disease, underlying tooth infections and bone loss impacting both oral and overall health. Cosmetic issues include mismatched restorations and an incisal cant (uneven smile line).
Solution: A full-arch All-on-6 implant restoration featuring a digitally designed restoration supported by six dental implants.
Timeline: Around 9 months from start to finish including healing time. Treatment was planned so the patient never had to go even one day without teeth.
A Full-Arch Rehab Using Digital Techniques
by Dr. Angelique Freking, DDS
At Park Slope Dentistry Seventh Avenue, Dr. Angelique Freking specializes in advanced restorative and implant dentistry, using modern technology to restore smiles with aesthetic and clinical precision.
For this case, the patient presented with severely compromised upper teeth. Medically, many teeth had serious infections and the gum tissue was unhealthy. Aesthetically, existing restorations varied in material and color, creating an inconsistent smile, and the patient had a noticeable cant (uneven smile line). The patient also suffered from a chronic cardiac condition which may have been exacerbated by their dental issues.
Given the number of issues on the upper arch, treating the individual teeth wasn’t a viable option. A full-arch solution was needed. While traditional dentures were an option, Dr. Freking recommended the modern, approach with better longevity: an All-on-6 implant borne permanent restoration.
What is an All-On-6?
An All-On-6 replaces the full-arch of teeth with a permanent restoration anchored by six implants. The process involves
Designing a custom, permanent full-arch restoration to replace the natural teeth.
Extracting the full-arch of teeth.
Placing 6 implants in the jaw.
Wearing a temporary while the bone heals and integrates with the implants.
Anchoring the full-arch restoration into the implants
The benefits of an All-on-6 over dentures include
Stability - Being surgically anchored, it won’t shift or slip.
Aesthetics - Looks and feel like your natural teeth
Function - Eat easily, taste more, and speak with ease
Maintenance - Easier to clean and care for.
Longevity - Built to last
Structure - Implants stop your jaw from losing bone after the tooth extractions.
Treatment Breakdown
step 1: evaluation
While the patient's smile seemed intact on first glance, closer examination revealed major issues

Black boxes: Bone loss and infection
Red boxes: Significant tooth decay
Blue boxes: Failing root canal
Step: 2: Treatment plan
Due to serious infection and bone loss, the 6 implants needed to anchor the full-arch restoration could not be placed immediately. The patient first needed extractions and bone grafting on the most infected teeth to create adequate bone for the implants.
This additional step necessitated more time for healing and the need for two sets of temporaries during treatment.
A temporary bridge to wear while healing after the first round of extractions and grafts, and then later the implant placements.
A full-arch temporary prosthesis anchored by implants to wear while healing from the final round of extractions
Step 3: Digital Planning and Design
Before treatment began, Dr. Freking scanned the patient's mouth using Park Slope Dentistry Seventh Avenue’s Planmeca CBCT scanner, and Medit Intraoral Scanner.

CBCT scan - Think of it as a digital 3D x-ray
Medit Scan of top and bottom arches
The CBCT scan revealed bone density in the jaw, quantity of bone, and the location of vital structures like nerves and sinus membranes with a level of precision standard x-rays cannot match. It also allowed the surgeon to plan the maximum width, size, angulation, and location of each implant to best suit the cosmetic and functional needs of the future restoration.
The Medit scan was used in designing the full-arch restoration and in helping to create surgical implant guides to aid in precise implant placement.
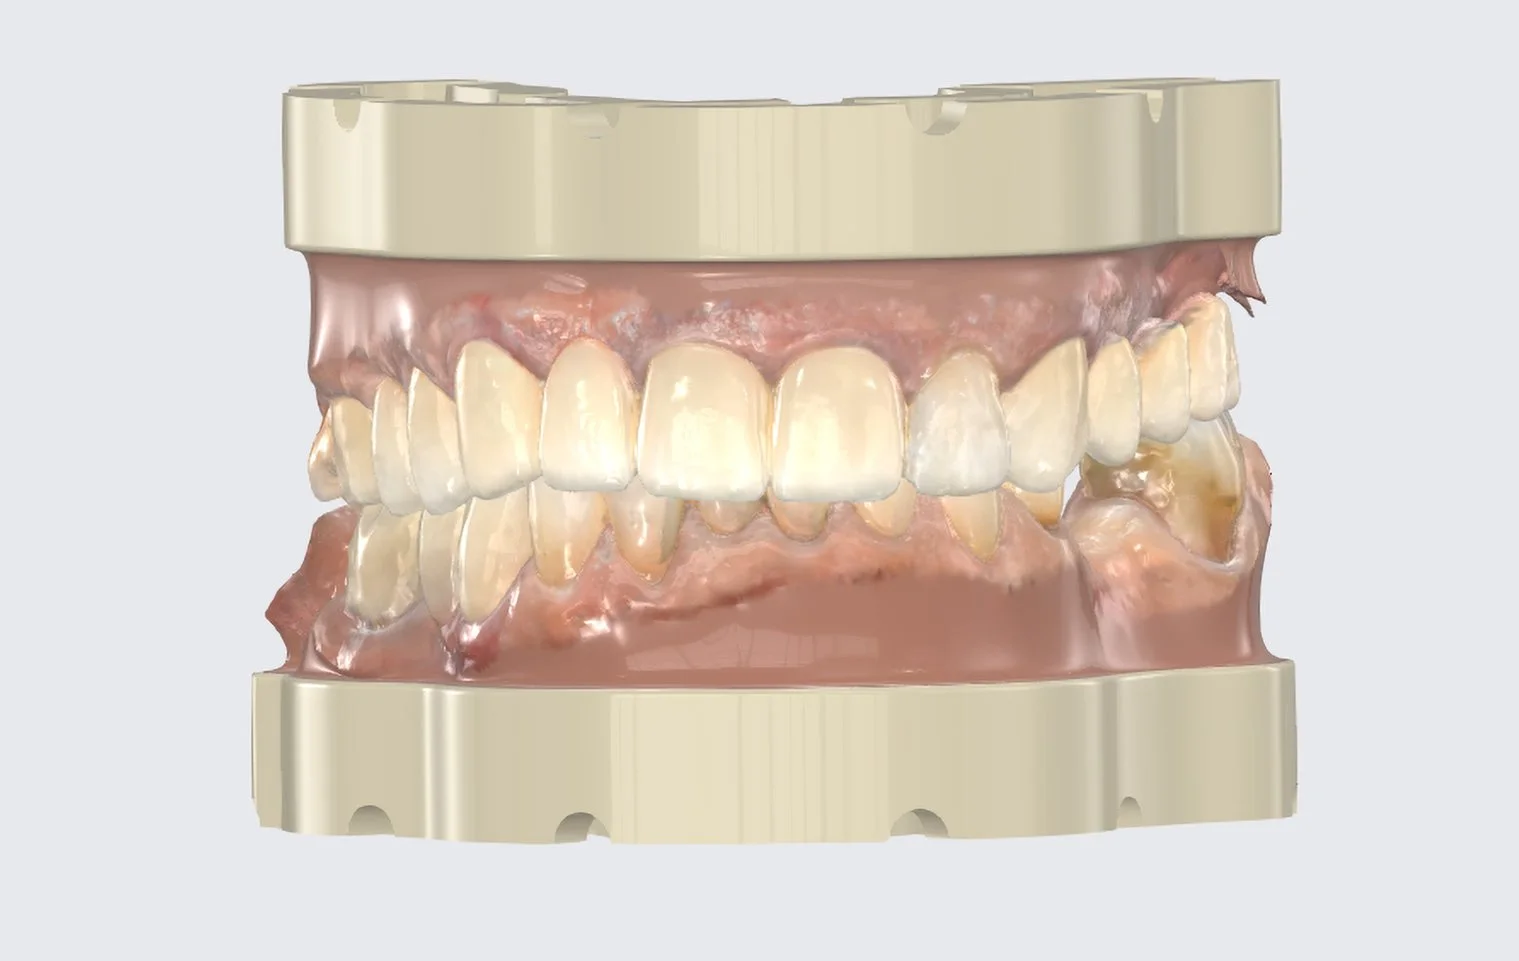
Next, working with a trusted lab, Dr. Freking digitally designed the final full-arch restoration. The patient’s preferences regarding their cosmetic goals were taken into consideration, and an old photo of the patient with healthy teeth was used for design reference.

Digital design of final upper arch restoration
Step 4: Extractions & Grafts and First Temporary
Dr Michel Zidile of Brooklyn Periodontics & Implant Dentistry extracted and bone grafted the patient’s most severely compromised teeth to build bone for the implants.
Dr. Freking then prepped the remaining teeth, scanned them with the Medit scanner, and relined and fit a lab-fabricated temporary full arch bridge. This was done the same day as the extractions so the patient never went a day without teeth.
Step 5: Implant Placement
After healing, Dr. Zidile placed 6 implants in the upper arch. The patient continued wearing their temporary bridge while the bone healed and integrated with the implants.

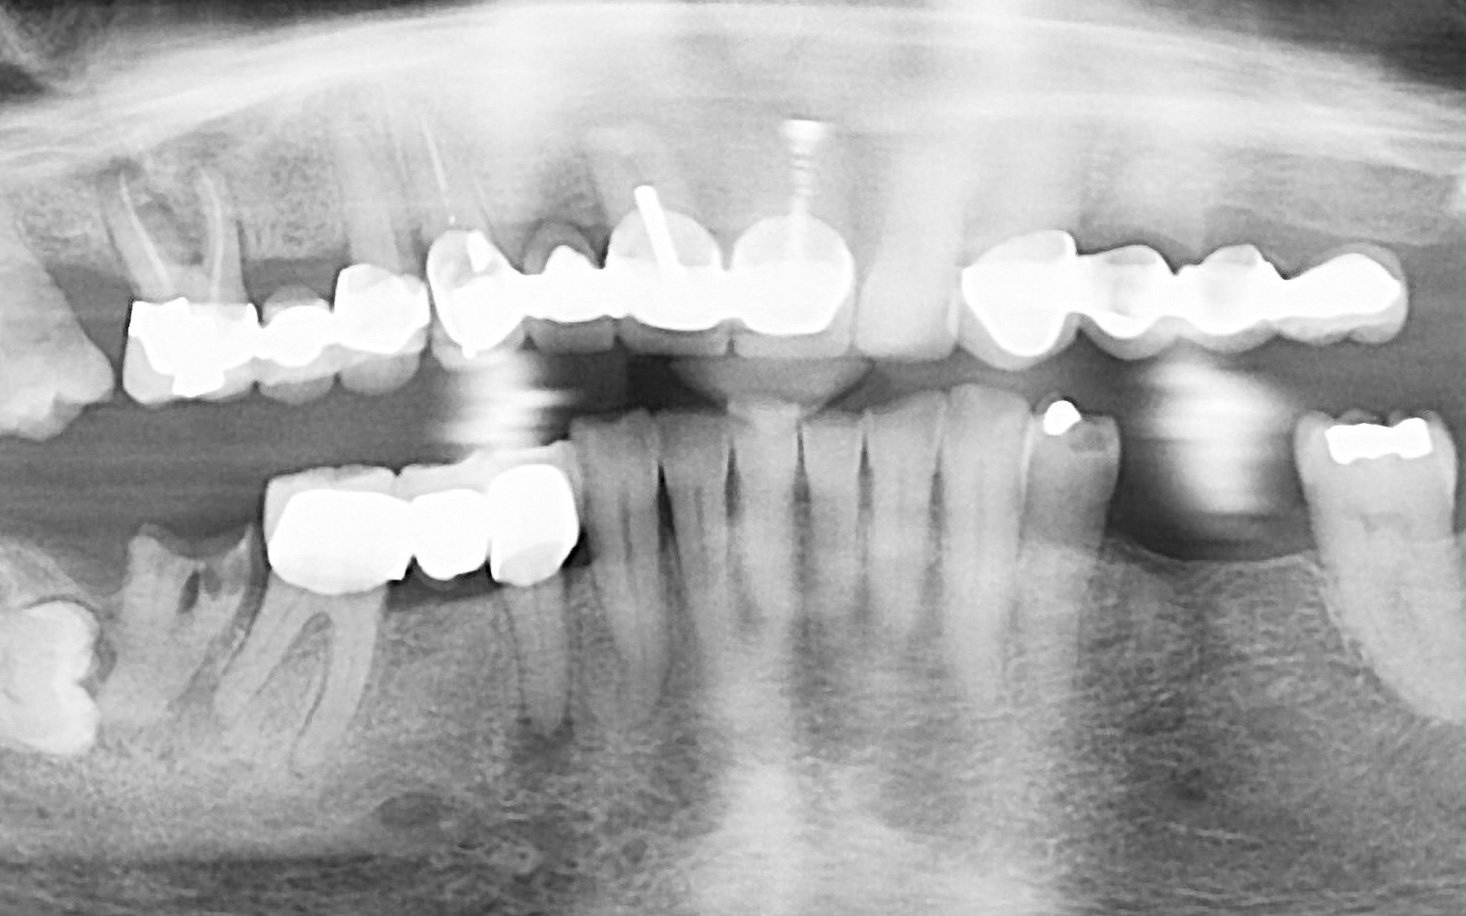
Panoramic x-ray after 6 implants were placed on the upper arch
Step 6: Final Extractions and Second Temporary
Once the bone healed, Dr. Freking 3D scanned the implants for the lab to design the implant-borne full arch temporary.

Medit scan of the 6 implants with scan bodies attached. Scan bodies allow the lab to see the placement and angulation of the implants
The lab returned the design, and Dr. Freking’s team 3D printed and customized the new temp in-house. By investing in 3D printing technology, Dr. Freking is able to quickly create temps as needed and customize the shading and glazing to ensure the patients feel confident while wearing temporaries.

3D printed temporary restoration. Notice the 6 holes that will be used to anchor the temp to the implants. Also a closer look at the temp reveals fine concentric circles—a hallmark of 3D printing. These subtle resin layers indicate that this is a temporary restoration
Once the temp was ready, the patient had their remaining teeth in the upper arch extracted. The same day Dr. Freking secured the new temp to the 6 implants, so the patient never had to go even one day without teeth.
Dr. Freking then assessed the temp’s fit and working with the lab, adjusted the design of the final restoration to look and feel more natural and suit the patient’s personal preferences.
Step 7: Final Restoration and Delivery
While the patient healed from the final extractions, the lab fabricated the final zirconia restoration. Dr. Freking ensured
A seamless blend with natural gumlines
Translucency for a lifelike effect
Proportions tailored to the patient’s facial anatomy

Front view of final zirconia restoration

Palatal view of final zirconia restoration. Photographed on a mirror to show the holes used for securing the restoration to the 6 implants
After the patient finished healing, Dr. Freking seated the final restoration, anchoring it to the 6 implants. Having used digital scans for planning the implants and restoration, she achieved a precise fit with less chair time for the patient.

Occlusal view of final restoration secured into upper arch
The occlusal view shows the small blue screws that secure the restoration to the 6 implants. After placement, Dr. Freking filled the holes with composite (the same material used in tooth-colored fillings) for a seamless finish.

Retracted view of final restoration

View of final restoration in a full smile
In the retracted view, you’ll notice a slight show-through where the implant’s collar sits close to the gumline. Full concealment would have required more surgery. But because of the patient’s low smile line, it’s not visible in their widest smile, so the patient understandably passed on additional, optional gum surgery.
See the Transformation


Before: Gum disease, mismatched restorations, uneven smile
After: A stable, natural-looking, and long-lasting full-arch restoration
Balanced & symmetrical smile design.
Seamless blend with natural features.
High-strength materials ensure durability & longevity.
Minimal maintenance - no need for regular removal unless an issue arises.


Before: Tooth infections and bone loss, failing root canals, periodontal disease
After: Resolution of all bony infection, stabilization of periodontal disease, and integrated, healthy implants
Patient Outcome and Follow-Up
More than two years later, the implants remain stable and fully functional. The patient is now considering undergoing a similar procedure for the lower arch.
Notably, the patient’s chronic cardiac condition showed significant improvement following treatment. This highlights the strong connection between oral and systemic health.
Why All-on-6 Made the Difference
This treatment provided the patient with
A permanent, fixed solution
Better aesthetics and function than dentures
Long-term oral and systemic health benefits
Renewed confidence and quality of life
I can’t stress enough how much All-on-6 implants improve quality of life over dentures. As you age dentures fit worse, fall out, and can make chewing and eating difficult. I’ve seen first hand older patients who don’t go out and live their life as much as they could because they’re uncomfortable and embarrassed by their dentures. All-on-6 implants let you forget about your teeth and live your life.
– Dr. Freking
Want to know more? Schedule a consultation with Dr. Angelique Freking.